Contacts
Contents
- Video
- Contacts Page
- Create Contact
- Adding your contact to a group
- Final step
- Import Contacts
- Column Selection
- Validation
- Invalid Numbers
Introduction
There are several ways to add new contacts to your account. If you have only a few new contacts, you can add them manually. Alternatively, you can import or upload a list of contacts to the portal and organize them into groups. This makes it easier to send targeted messages to specific demographics.
Video
Contacts Page
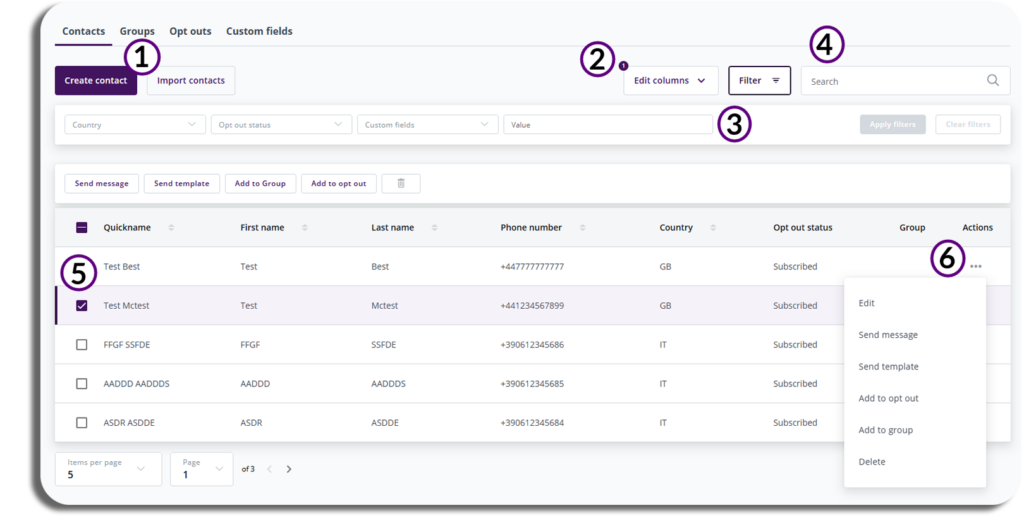
In the image below, you will find the Contacts & Groups section. This section allows users to either manually add individual contacts or perform a bulk upload of multiple contacts.
From this page you will be able to do the following:
- Create or import your contacts.
- edit the visible columns shown on the page.
- Filter your contacts by Country, Opt-out status, custom filed and Value.
- Search your contacts.
- Selecting the tick box next to the contact will give you quick options for sending messages and templates to the contact, adding them to a group or opt-out and deleting the contact.
- Selecting the three dots will let you edit or delete the contact as well as all of the options from number 5.
Create Contact
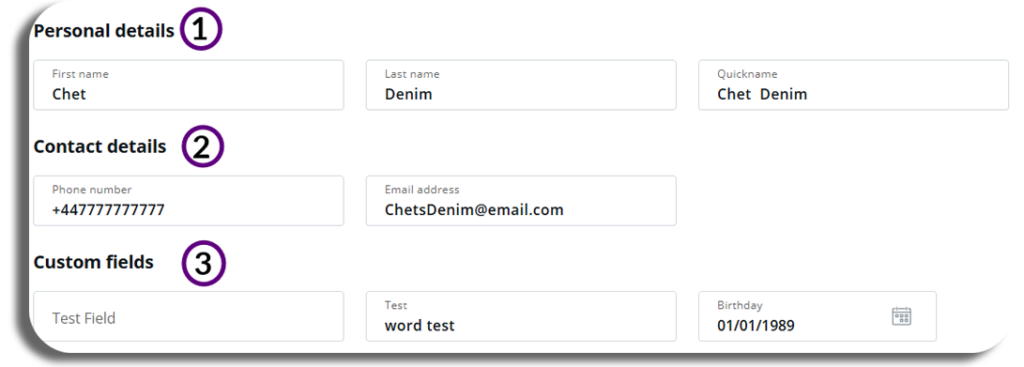
Selecting Create Contact will begin the manual process of creating a contact, you will be taken to the Create Contact page, the below image will have a breakdown of what will need to be added to create the new contact.
- Personal Details: Enter the customer’s first and last name, this will generate a quick name for them, but this can be amended if needed/requested.
- Contact Details: Customer’s contact details
- Custom Fields: Any custom filed you have created will appear here e.g. date of birth.
Adding your contact to a group
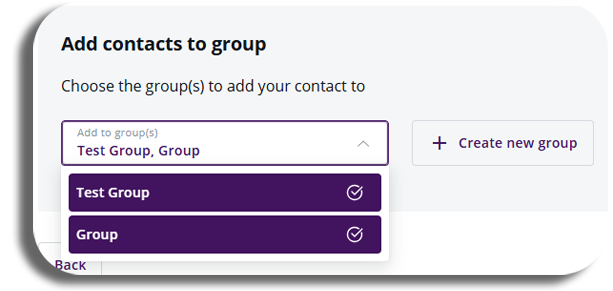
You will have the option to add your new contact to an existing groups or create a new group to add your contact to.
Existing Groups
To add your new contact to an existing group select the dropdown and pick the group you require, you will be bale to add them to multiple groups if needed as shown in the image.
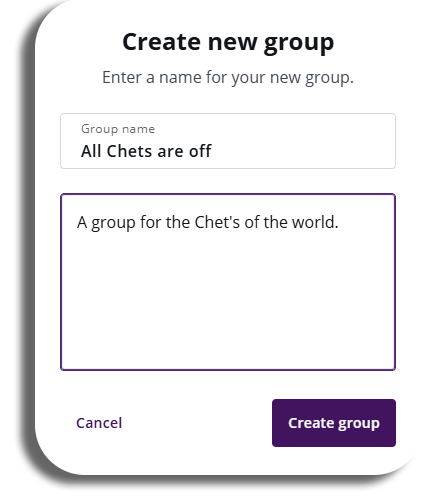
Adding to a new group
To add your new contact to a new group, you will need to create the group, this is an option during the crate contact process.
To Create a new group select create a new group and you will see the below pop-up.
You will need to add a Group name to create the group a description of the group is optional.
Final step
Now that you have filled out all your customer’s information and added them to a group, you have two options on how you can proceed:
- Save & add another: Selecting this will save the current contact and you can create another contact from this page
- Create contact: This will create the contact you have made and add them to the overview page.
Import Contacts
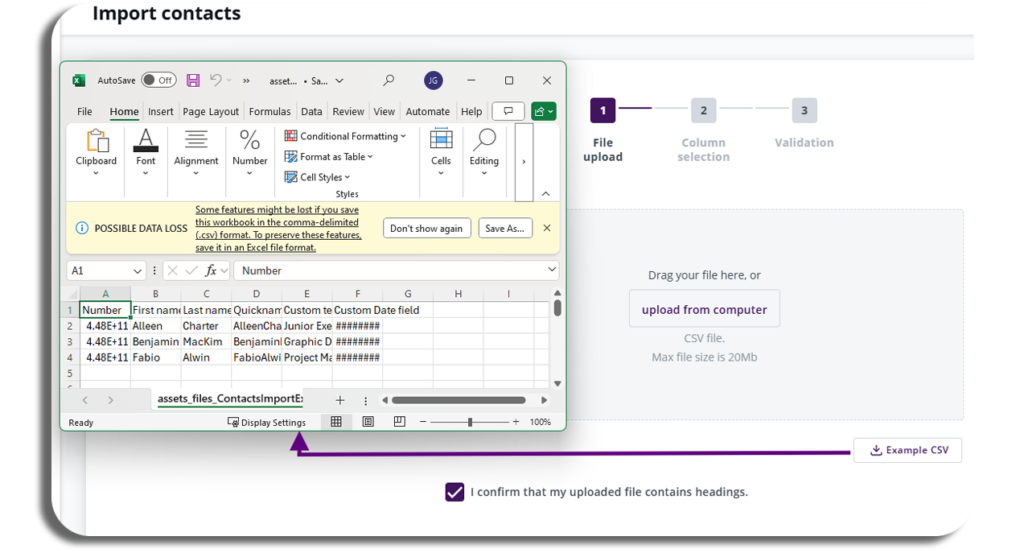
Selecting the import contacts button will give you the option to upload a CSV file from your computer, you will also have the option to use our example CSV file if needed.
Once your file is uploaded, tick the confirmation box and press the next button.
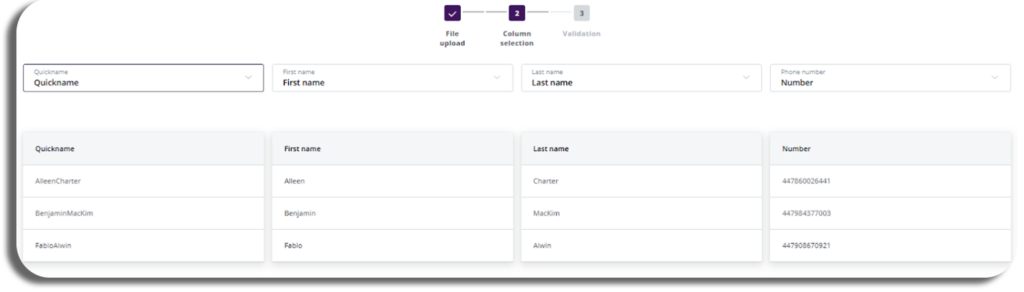
Column Selection
You will now be in column selection here you will see the columns you have created and the information in these columns, four columns will be visible on the screen but you can select the drop downs to change the columns you have on your file, and select next to continue.
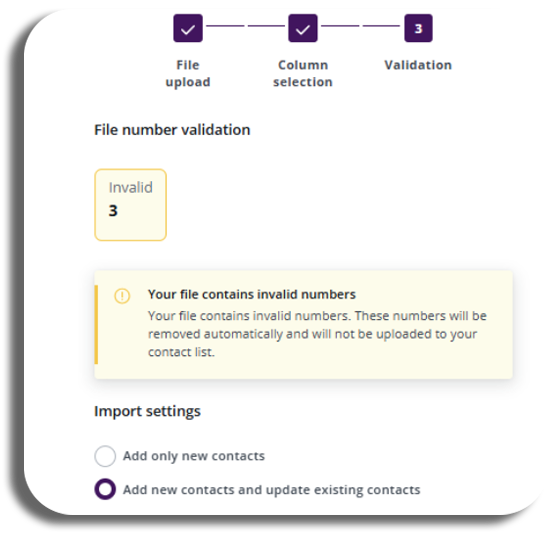
Validation
You will now be in the validation stage, You will be shown the number of valid files and be given two options on how to import.
- Only add new contacts – this would exclude any numbers you have already imported.
- New contacts and update existing – this would update your existing contacts with any changes as well as adding new ones.

Once you have made your choice, press the next button to complete the import, congratulations.
Invalid Numbers
If you have any invalid numbers they will be removed automatically from your upload, if all your numbers are invalid then you will not be able to proceed with the upload.
To learn more about the next section of the Contacts & Groups, click here.