Conversations
Contents
Introduction
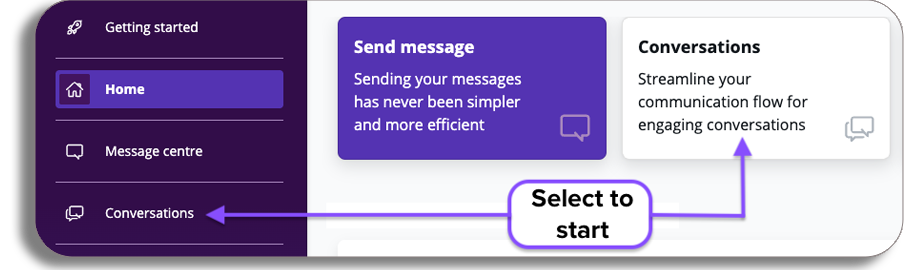
You can easily access your inbound messages and conversations by navigating to the ‘Conversations’ tab located on the left-hand side of the screen. Alternatively, you can find it in the centre of the portal homepage by clicking on the ‘Conversations’ quick link.
Upon entering your conversations, you will encounter a chat interface designed for direct interaction with customers on a one-to-one basis. This setup enables personalized communication and assists in addressing customer inquiries effectively.
Please watch the below video to learn more, or continue reading the guide.
Video
Overview
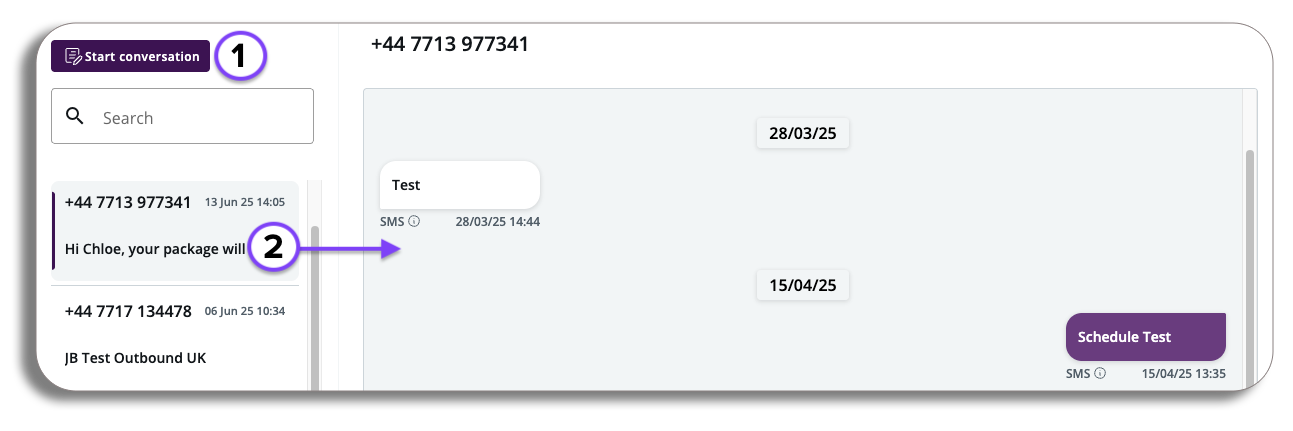
From the layout below you will be able to do the following:
- Start a new conversation by selecting the start conversation button.
- Select an existing conversation from your conversation History and continue the conversation.
Starting a conversation
Entering a Number
When you choose to start a conversation, a popup will appear prompting you to enter a phone number. You can either input a new number to initiate a fresh conversation or use an existing number to resume a prior discussion.
PLEASE BE AWARE– you will need to enter the international format to start a conversation

Text box
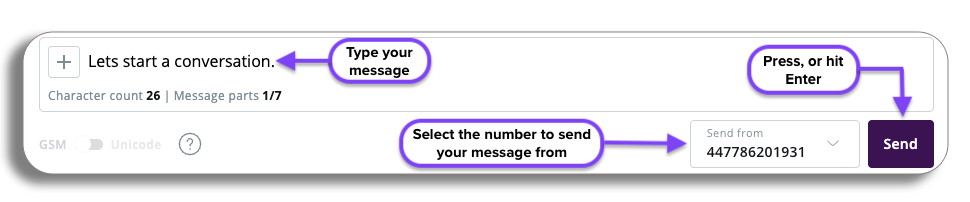
As you begin the conversation, please use the text box at the bottom of the chat area to compose your message and reply to your customer.
You will also be able to select the number the message will be sent by from the ‘Send from’ dropdown.
To send your message, either press the Enter key or click the purple send button at the bottom of the page.
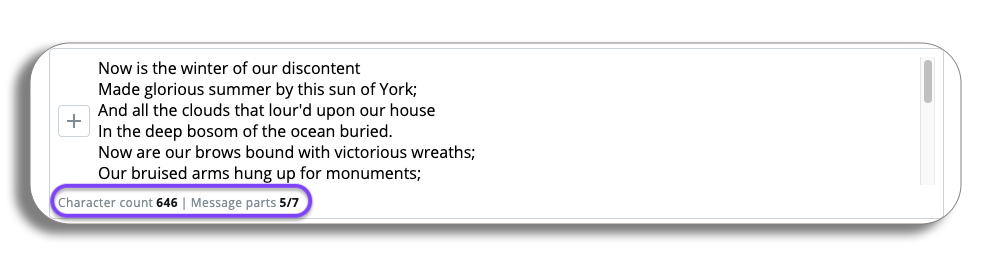
You will also have the option to send larger messages which can consist of up to 7 parts.
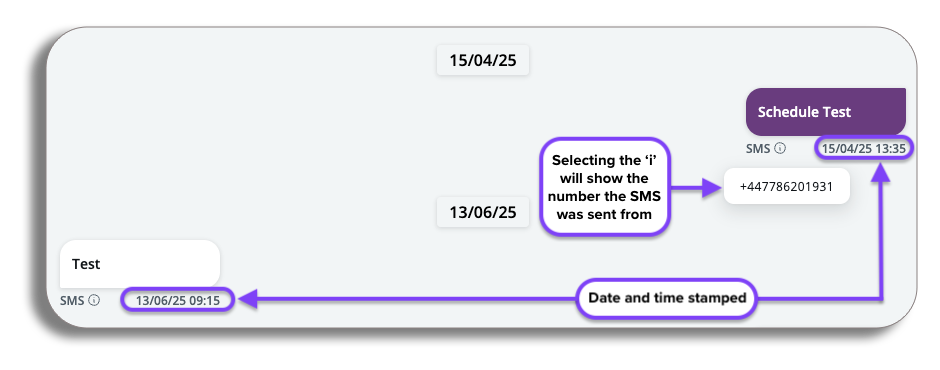
All parts of the conversations are now time stamped showing the date and time of when the message was sent.
You will also be able to view the numbers used in the conversation by selecting the information icon under the message.
Profiles
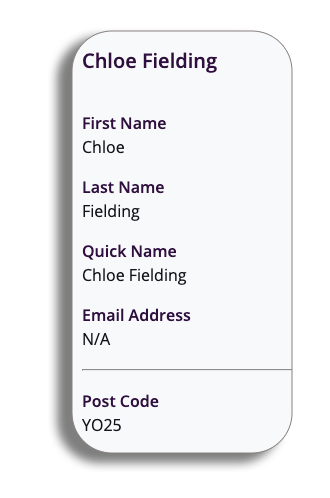
Once a conversation is created, you can create a new contact by adding the recipient’s details on the right-hand side of the chat interface. Add the recipient’s name, and any identifying property labels or values, and press ‘save contact’.
Adding a template
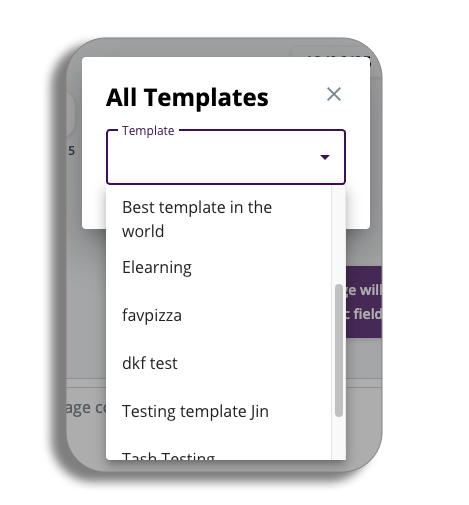
The plus button located in the message content area allows you to choose a template for use in your conversation. When you press the plus button, you’ll see an option to send template. Selecting this option will present a dropdown menu featuring the templates you have created, enabling you to easily customise your messages.
Once you have chosen your desired template, a preview of the message will be displayed.
Template personalisation
In the preview of the template you have selected you will see the following
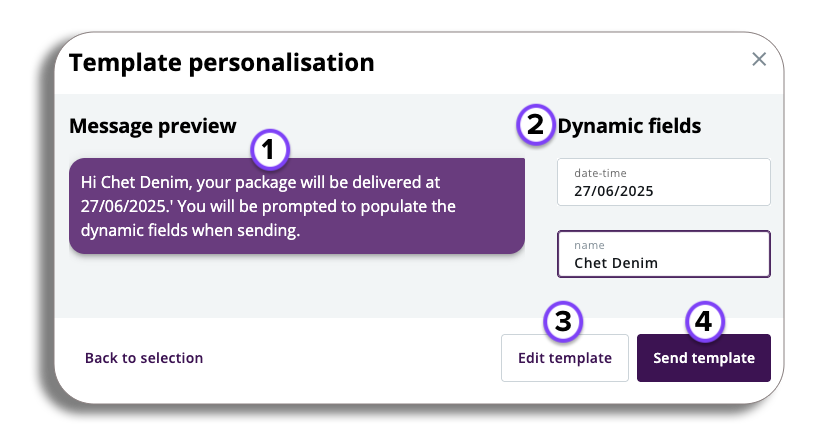
- Message Preview: Here you will a preview of the message template you have selected (If you have selected a message template with dynamic fields, those fields will appear in the template).
- Dynamic fields: Any Dynamic fields that appear in the template can have the relevant information added here. (You will be required to add the specific custom field content required for your message)
- Edit Template: If you want to make further amendments to the template you can by selecting the edit template button.
- PLEASE BE AWARE– Editing this will open a new tab to the message template section of the platform.
- Send Template: If you are happy with the template, press send template.
Congratulations! you have started a conversation