Message Centre – Recipients
Contents
Introduction
Welcome to the Message centre, here you will be able to create an SMS message and arrange the amount of recipients who will receive the message its design and the schedule of when it will be sent.
You have the option to watch the below video on selecting your recipients or go through the written guide below the video to learn more.
Video
Recipients Page
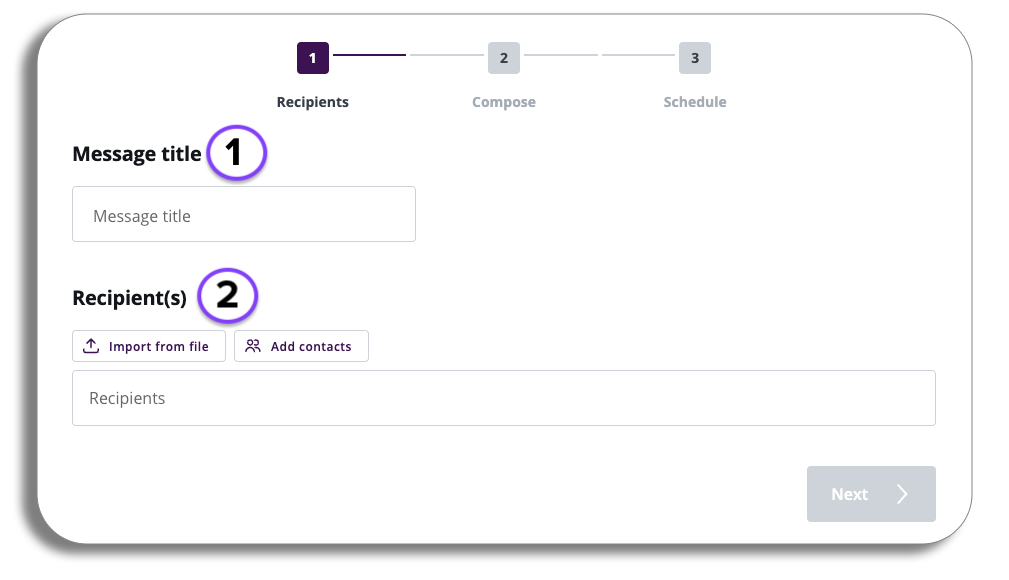
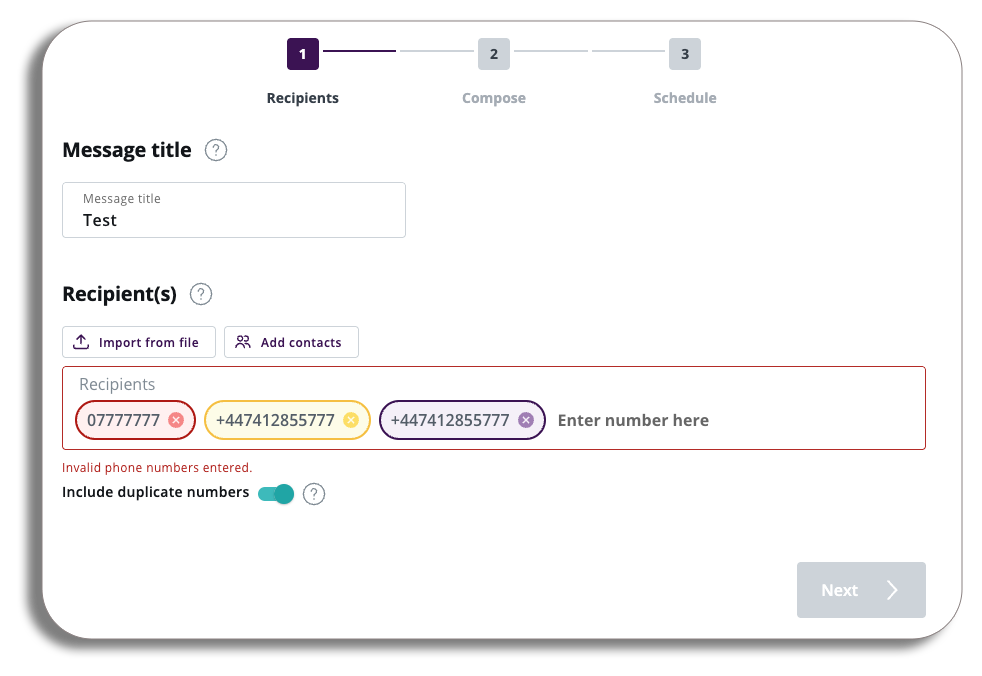
Let’s take a look at the part one of sending a message:
- Message Title: Enter your message title and recipients. (the recipients will not see the message title).
- Recipients: you can enter your recipients manually, importing a CSV file or from contacts and groups. You can enter up to 1000 Numbers separated by commas or spaces in the following formats 07700900043, 4477009000044 or +447700900045.
Adding Recipients
There are three ways to add recipients to your message, manual input, Import from file and contacts. let’s break down the options.
Manual Import
To enter a phone number Manually select recipients and input your number. For each individual phone number you will be able to enter up to 15 digits, not including the country code.
If you would like to input a number with a different country code add a +. If you don’t include a + at the start of the number, one will be added. For example, 447716123456 will become +447716123456.
Import from File
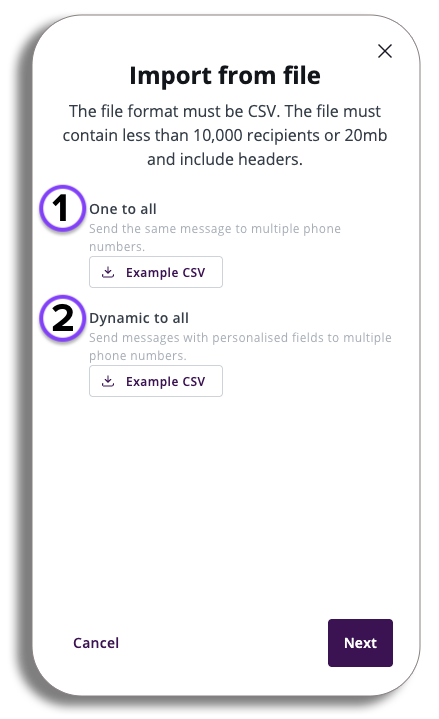
By selecting this option in recipients you will import your numbers by using a file. The file must be a CSV file and contain less than 200,000 recipients or 20 Mb. It must also contain headers.
You will have two options when importing a file:
- One to all – this will let you send the same message to multiple numbers. (you can download our example CSV if needed).
- Dynamic to all – send messages with personalised fields in multiple phone numbers (see CSV file example).
We have provided an example CSV for you to download if required, once you have made your selection and have your file ready select the next button.
Dependant on your choice you will be given a pop-up to upload your file and a few boxes to check before your start the import (see examples below)
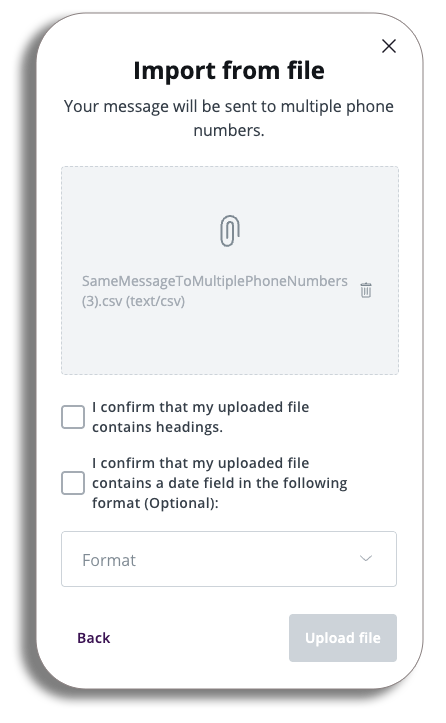
One to all
This option allows you to send the same message to multiple contacts without any personalization.
“Enjoy special offers on flower bouquets this weekend! Be sure to place your order today.”
Once you have imported your file, tick the confirmation box and upload.

Dynamic to all
This option enables you to create personalized messages using data you’ve collected about your customers. For example:
“Hi, thank you for your flower order. It will be ready for collection from our location on _.”
Once you have imported your file, tick the confirmation boxes and select the format for your dates you have used.
Add Contacts
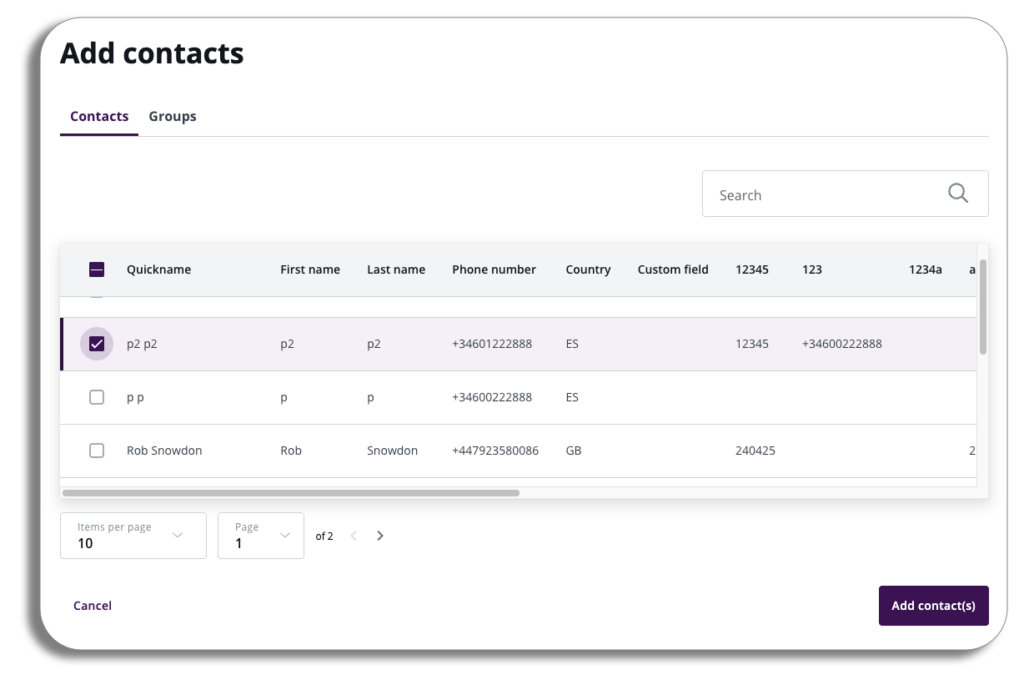
Next to Import from file you will have the import contacts button, pressing this will bring up the contacts and groups you have created by selecting the tick boxes on the pop-up you can either select the contacts individually or by selecting the tick box next to the quick name will select all of them.
You can select the group tab and you will have the same options to select the group or all the groups you currently have.
Number Validations
When you enter phone numbers manually or upload them from a file, successfully recognised numbers will be shown in a purple circle. Duplicate numbers will be highlighted in yellow, while invalid numbers will be marked in red.
With your Recipients uploaded, select the Next button to move on to the composition.