Message Template – Creating a new template
Contents
Introduction
The template library is where new templates are created and saved ones can be found and edited, let’s take a look at how to create a message template on the platform.
Accessing Message templates
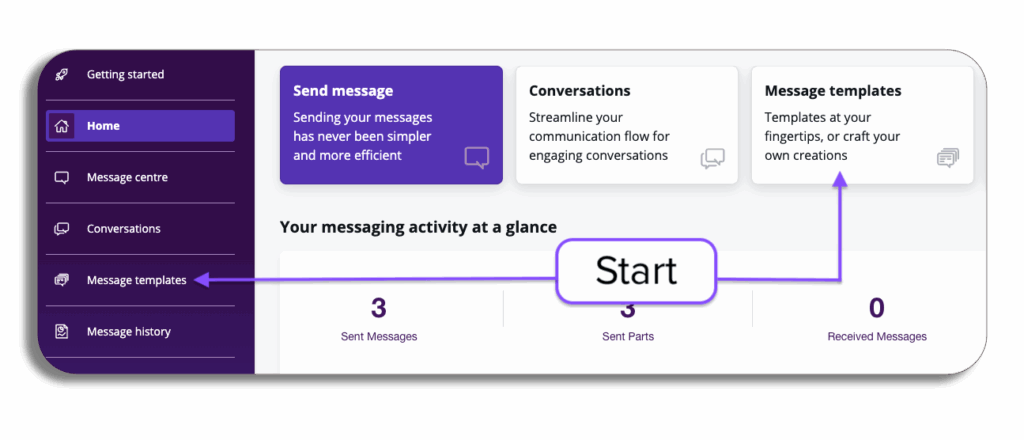
Select for a quick refresher for getting to the Template library.
You will be able to access the Template library from the left menu column or from the quick link.
Choose a template
On the Template Library select create new template and you will start the process of creating a new template, a pop-up will appear.
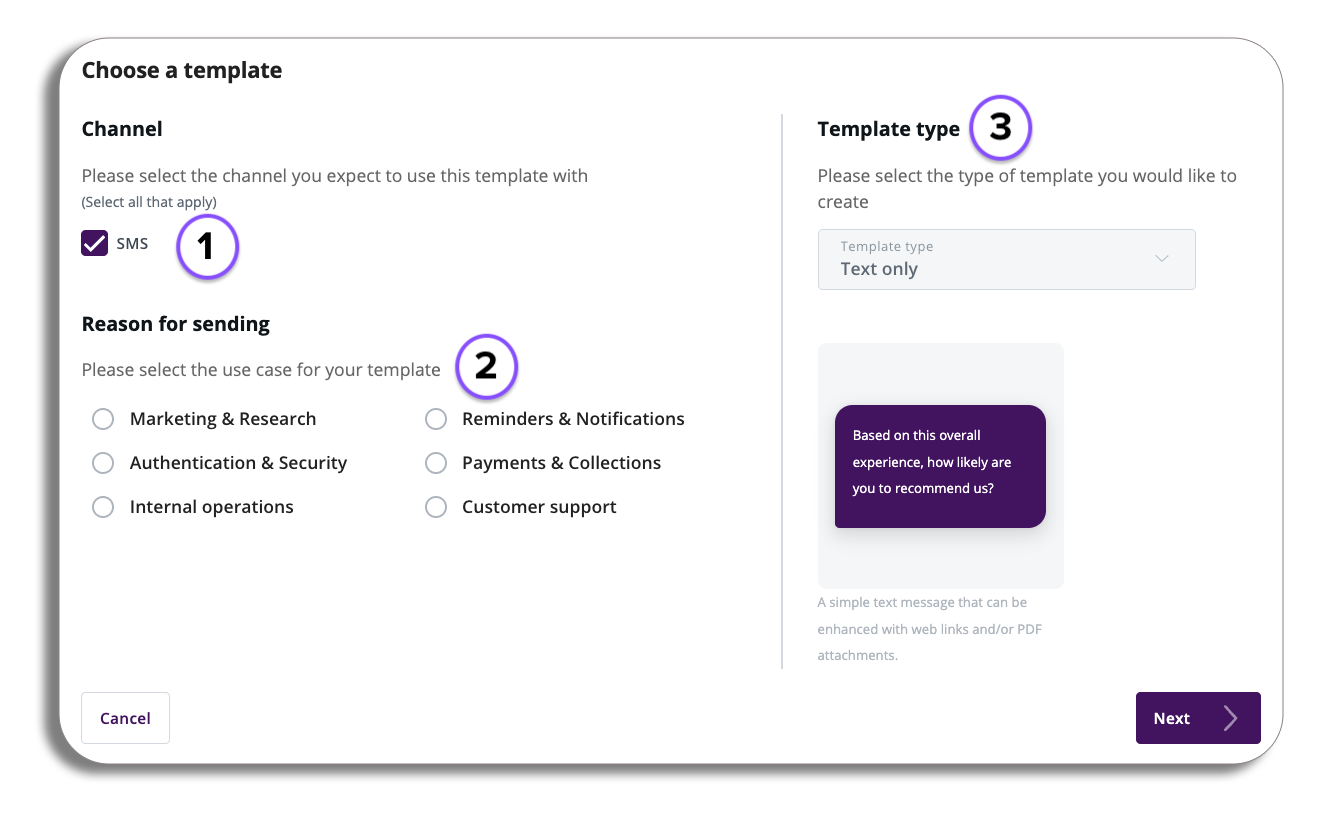
- Channel – Select the channel you expect to use this template with, you will need to select at least one channel to proceed with template creation (SMS is only available at this time).
- Reason for sending – You will need to select the use case for your template before proceeding, selecting this will be used for reporting purposes.
- Template Type – selecting the drop-down will give you access to different template types you can use, selecting one will give you a preview of how the template will look as well as a brief overview of the template type. (Currently Text Only).
Once you are happy with your selections press the next button to proceed.
Text template Editor
You will now be in the Text Template Editor
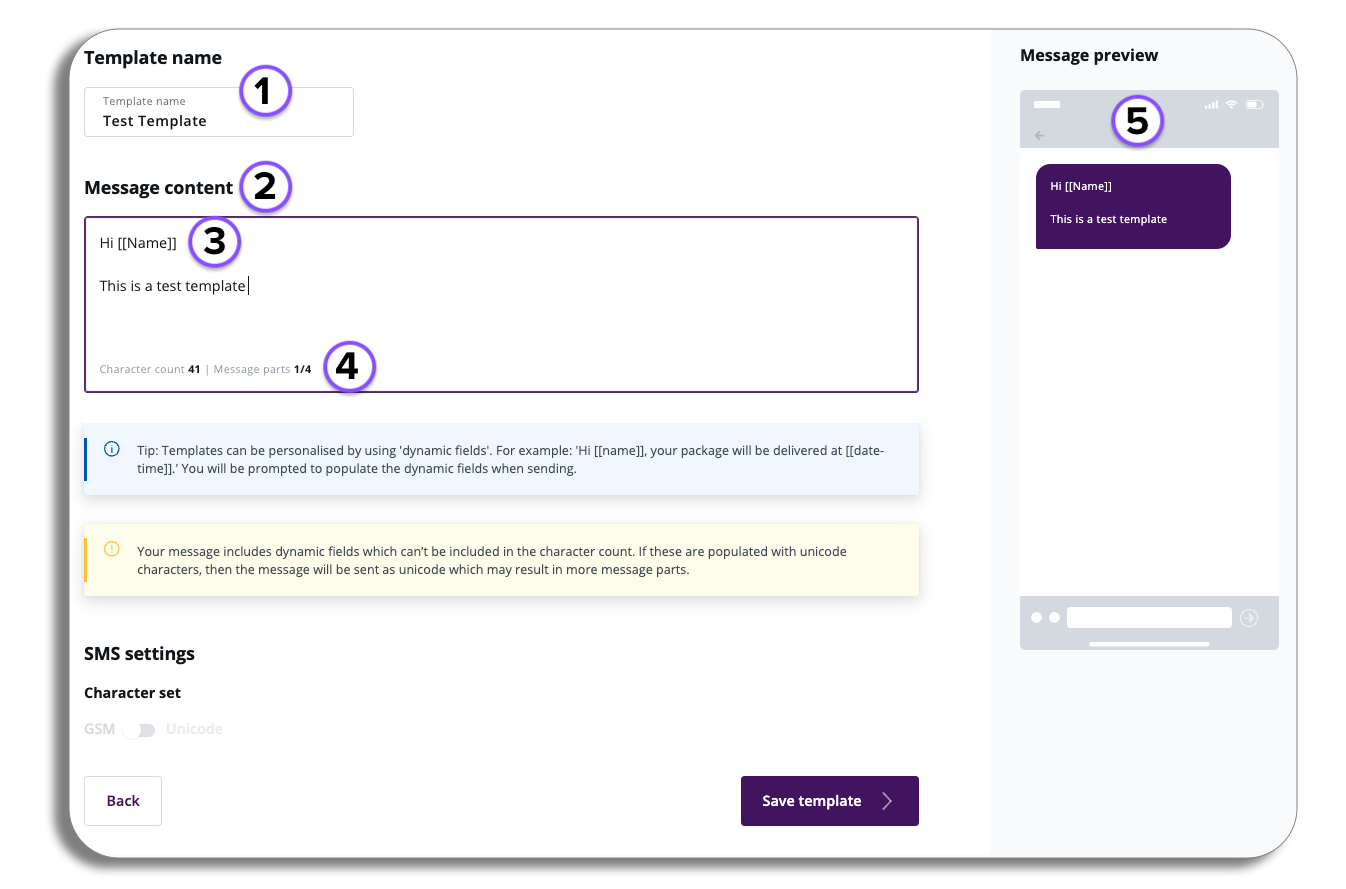
- Template Name – Enter the template name you want to show and search for in the template library.
- Message Content – Enter the content of your message here.
- Dynamic Fields – You will be able to enter dynamic fields into your message i.e. name of date, please be aware that the fields won’t be included in your character count and you will be prompted to to populate the dynamic field when sending.
- Here you will see how many characters are being used and how many parts your message consists of ( max character count is X, Max message parts is 7).
- Message Preview – here you will have a preview of how your message looks as well as how many parts or additional media is being used in the message.
The final step is to press save and you will created your new message template.
PLEASE BE AWARE – that if you decide to leave the Text template editor, you will be advised that any unsaved changes you have done will not be saved.