Message Centre – Compose
Contents
- Video Guide
- Overview
- Sender
- Compose Message
- Message Overview
- Message Type
- Send Summary
- Message Preview
- Test Message
Introduction
We are now at the second stage of sending a message, composing. Let’s go through each section individually as we go through composing the message.
You have the option to watch the below video on selecting your recipients or go through the written guide below the video to learn more.
Video
Overview
Below in the compose stage of creating a message, we will go through each section and break down what they can do.
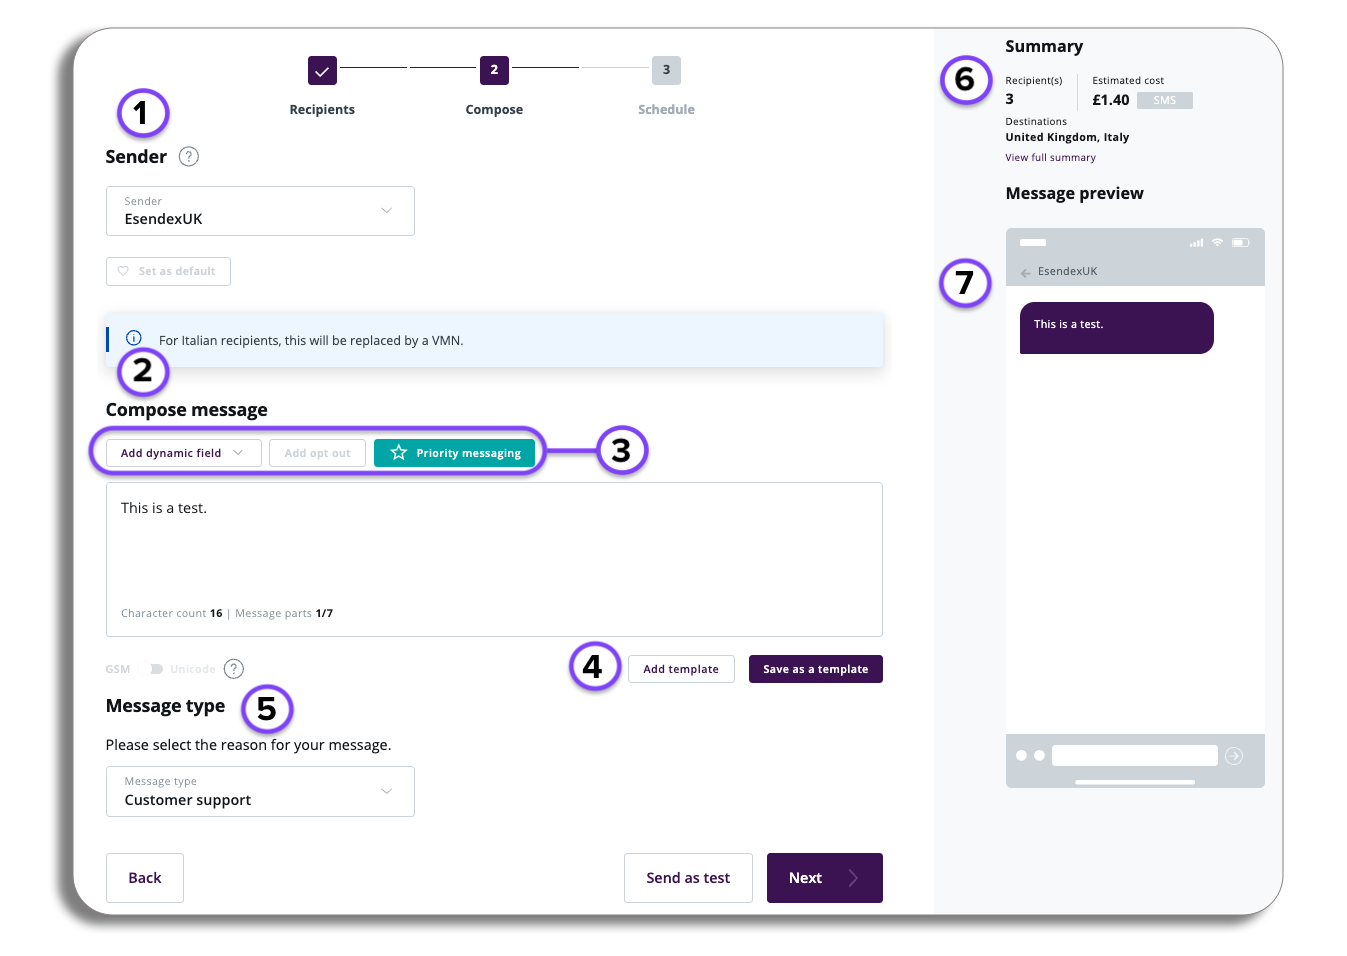
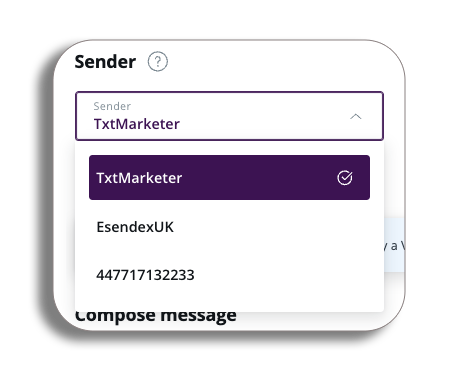
1.Sender
Sender ID
Choose your sender ID from the drop-down menu. If you have set a default sender ID, it will be automatically displayed in the drop-down.
This ID represents the name or number that your recipients will see when they receive your messages.
Are you an Admin?
If you have admin access you will also have the option to set the Sender ID as the Default ID.

2.Compose Message
It’s time to compose your message. The character count at the bottom of the text box will increase as you type. A standard text message can hold up to 160 characters. If you exceed this limit, your message will be split into multiple parts, with each part allowing a maximum of 153 characters due to a 7-character overhead for joining them. The total limit is 612 characters.
Be aware that some characters, like the Euro symbol, count as two characters, and any carriage return or line break also adds one character.
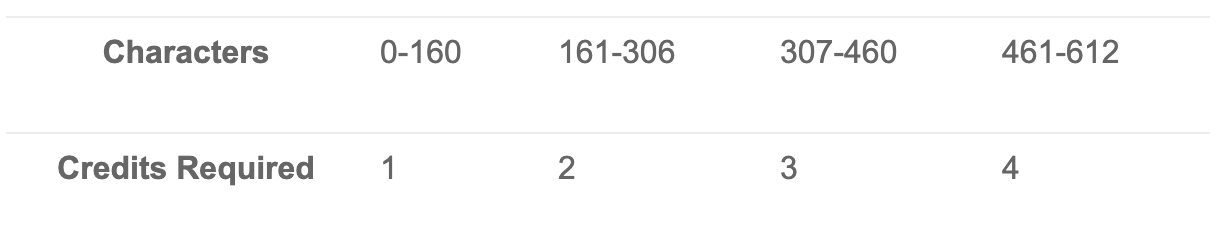
Keep track of the message parts at the bottom of the text box, as charges are based on parts, not characters—one credit per message part. If your message includes non-Latin characters or special symbols, it will switch from GSM to Unicode automatically.
Message Overview
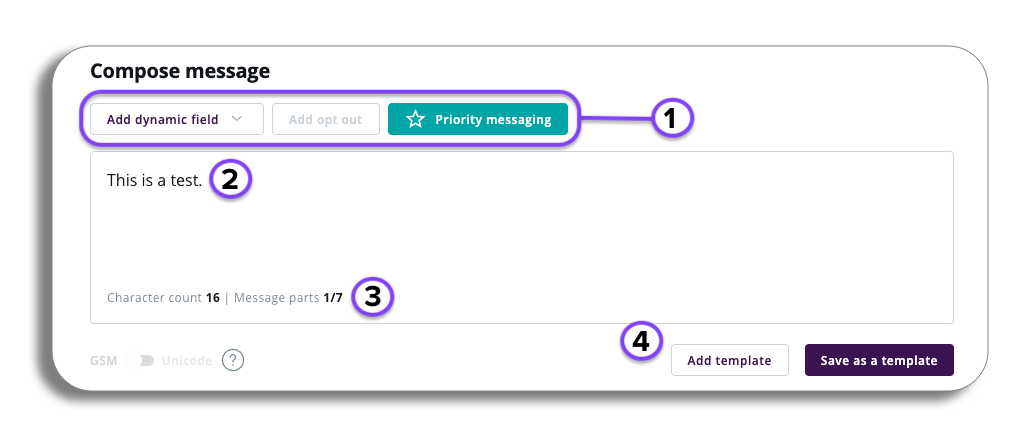
- Content Tools: A selection of tools that you will be able to use to enhance your message composition.
- Text box: Manually enter the text required for your message.
- Character & Parts Count: Keep track of your character count and message parts (a single message is 160 characters).
- Templates: If you have an existing template, select “Add Template” to choose or create one for your message. You can also save your current message as a template for future use.
3. Content Tools
- Add dynamic field: Selecting the drop down will let you select a dynamic field for your message. This will cover all custom fields (to learn more about cusotm field click here).
- Add opt out: This will add an opt out segment to your message
- Message Prioritisation: request message prioritisation on this message, you will have the option to directly contact our team through phone and email or submit a request here.
4. Templates
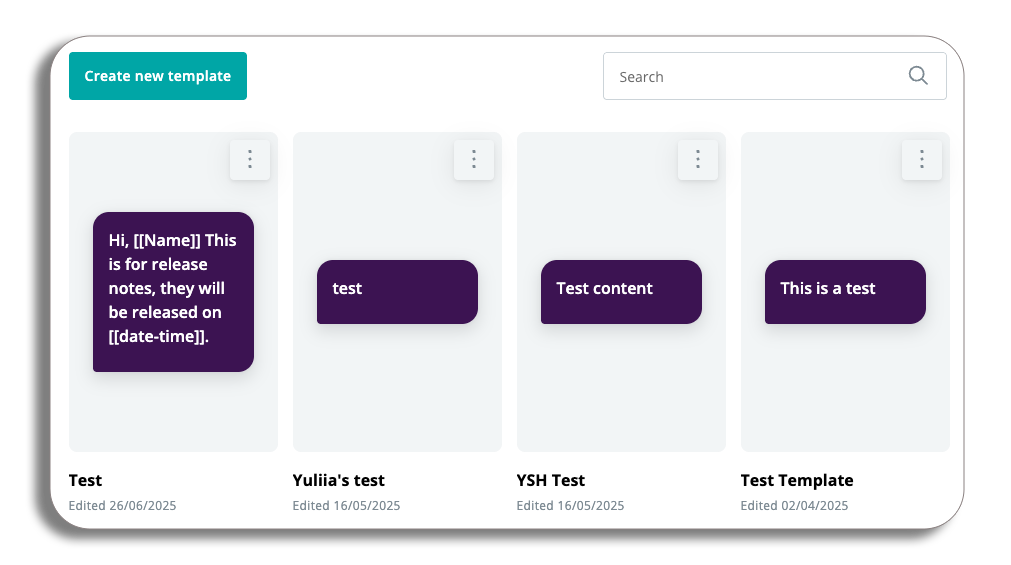
You will have access to pre-designed templates in the template library. this will be accesible to you when selecting add new template.
You will get the below pop-up that will show you the current templates that have been created, selecting one of the templates will ask you to confirm the selecting and then add it to your message composition.
Selecting the 3 dots on the message will give you the option to edit the template or lock it (stopping others from editing the message).
Please be aware – if you edit an existing template you will be taken to the Text template editor.
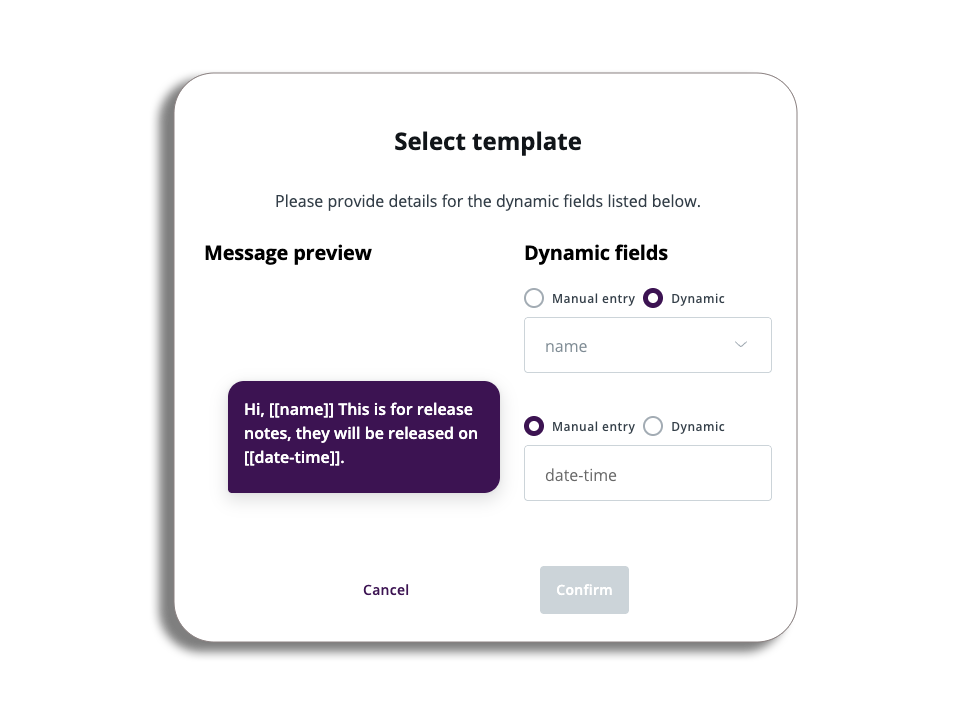
Selecting an existing message which has custom fields will ask you to add the information required for those fields, you can enter this information manually, or select Dynamic and select one of the options that matches the field.
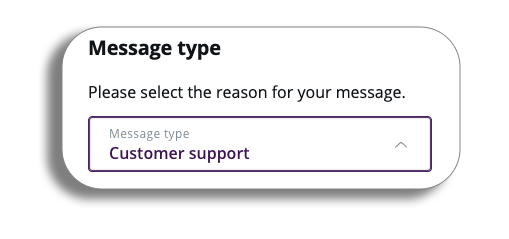
5. Message Type
You will need to select a message type before proceeding, the message type you select will be used for reporting purposes.
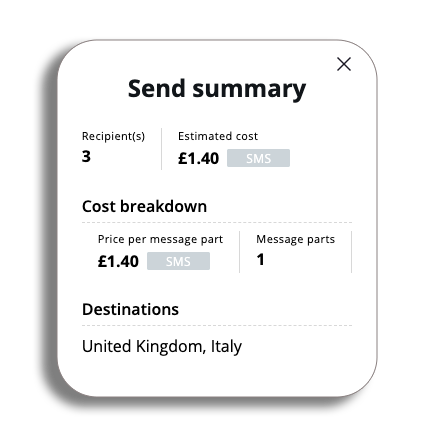
6.Send Summary
In the Summary section, you will have the option to view the full summary of your message, by selecting View full summary.
- Send Summary: The number of recipients and estimated cost
- Cost Breakdown: How much each individual message costs
- Destinations: to countries you will be sending the message to
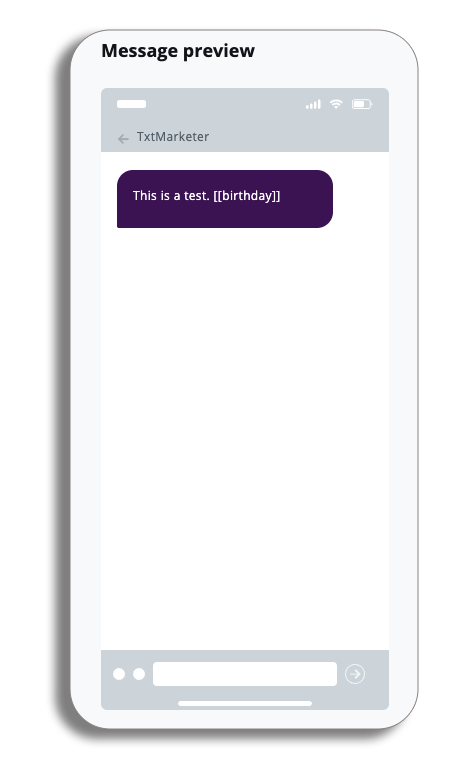
7. Message Preview
When composing your SMS, you can view it in real-time in the message preview window located on the right side of your screen. This feature allows you to see how your message will look as you create it.
Test Message
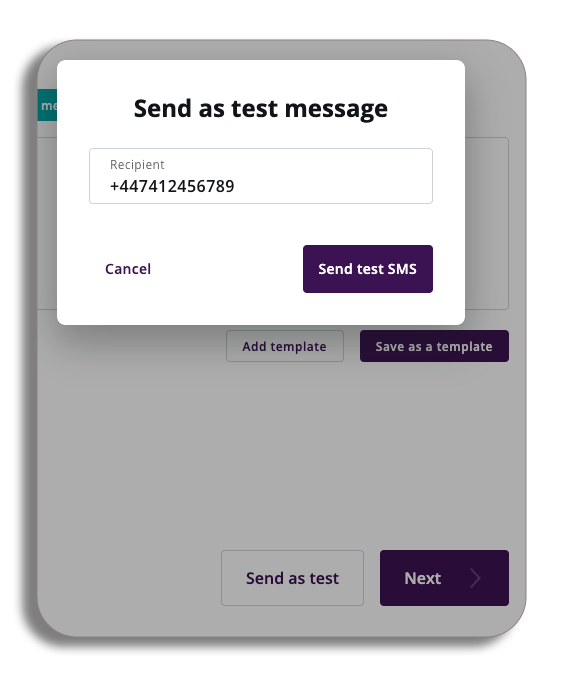
Once you have finalized your message and are satisfied with its content, you will have the option to send it as a test message.
By selecting this option, a popup will appear prompting you to enter a contact number to which you can send the message for review.
Once you are happy with your message press Next.
You will now be taken to the final stage of the Message centre, Schedule.