Receiving settings – Auto Responses
Introduction
The Auto-response function is an automatic outbound response that you will be able to set for any inbound messages, helping you respond quickly to your customers when you are not available.
Accessing Auto responses
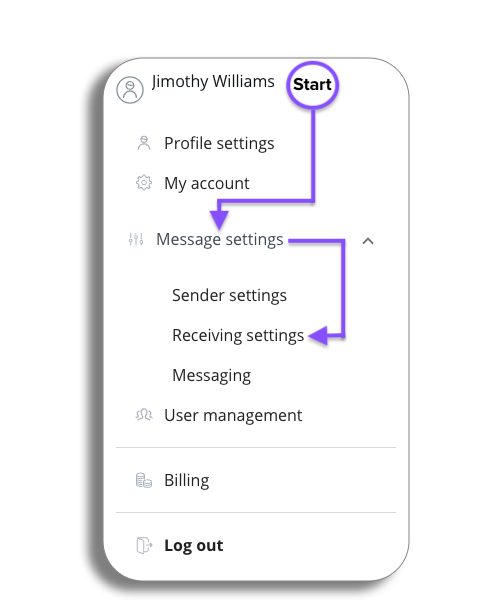
- Select your profile and from the drop-down select Message settings.
- from the message settings drop-down select Receiving settings
- You will now be taken to Auto Responses.
Auto Response
You will now be on the Auto Responses page, here you will be setting up an automatic outbound response for incoming inbound messages.
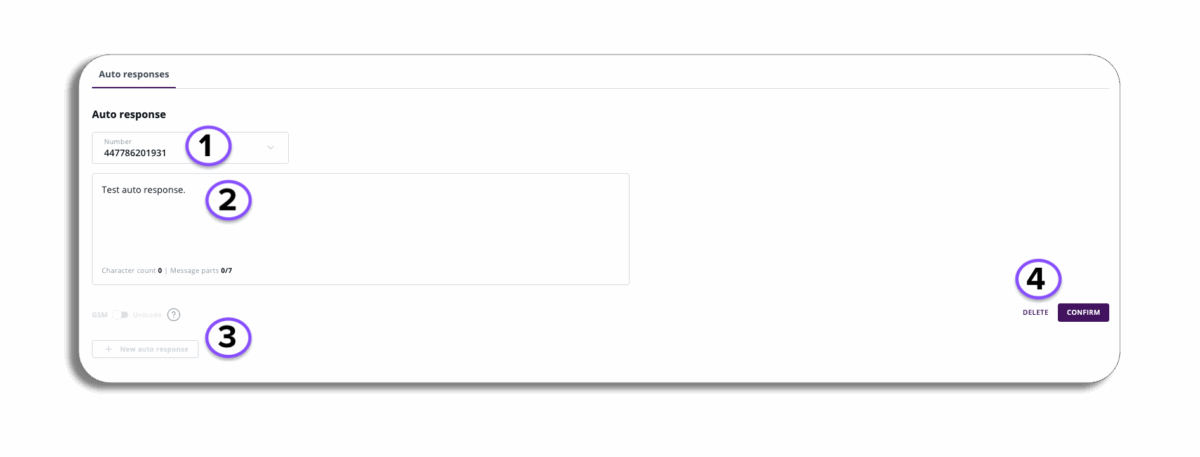
- Number: The Number that will be seen by the recipient from the Auto response, this will be a VMN that the Users can set up with our customer success team.
- Text Box: Enter the message you want for your auto-response.
- New auto-response: When you first enter the Auto response section you will have the option to set a new auto response, if you have more then one VMN setup to use for auto responses this will also be active to set another Auto response.
- Confirm & Delete: Confirm your Auto response or delete it.
Forwarding Rules
Forwarding rules give you the power to automatically forward inbound customer messages to a VMN or email inbox, ensuring a quick response from your teams, ranging from out-of-hours support coverage to delivering critical alerts.
Let’s take a look at setting up a forwarding rule. Select the tab, and here you will see where all of your forwarding messages will be. You can filter these between active and inactive if needed.
Let’s create a new rule. Select the new rule button.
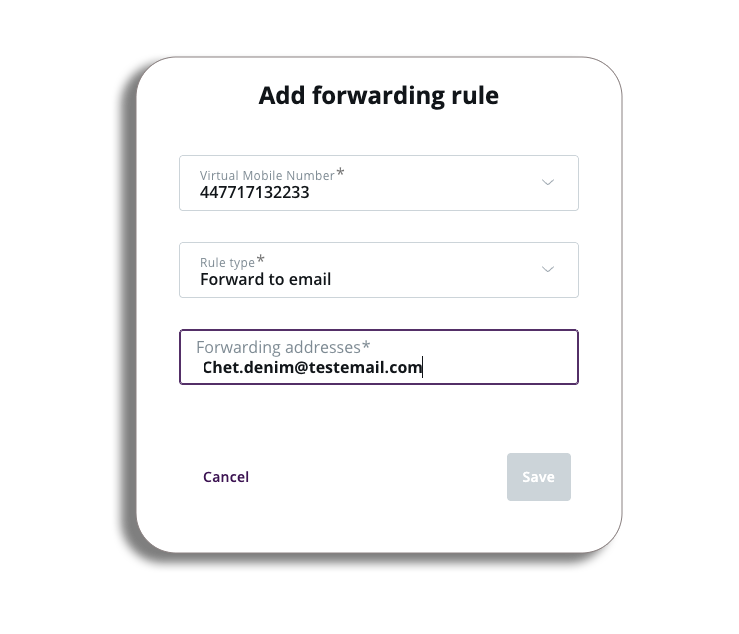
In the pop-up, you will have three sections you will need to complete. Let’s break them down
VMN: Add your VMN number
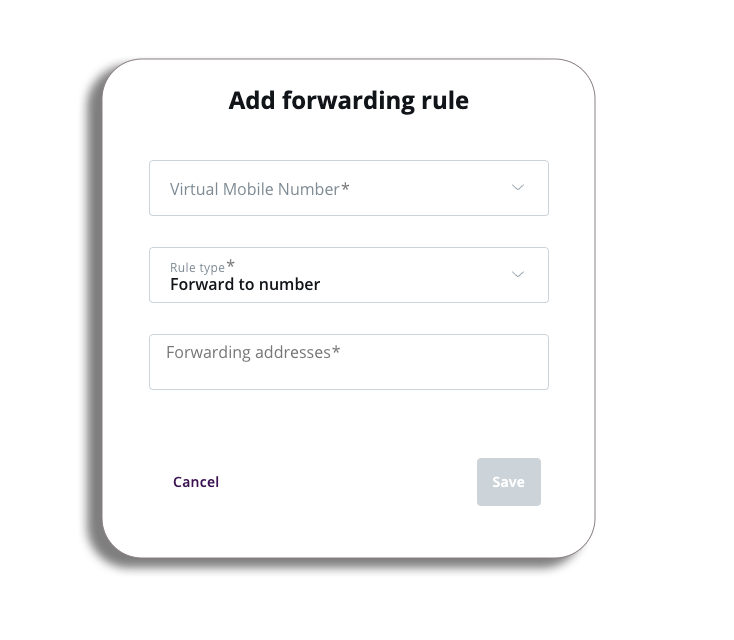
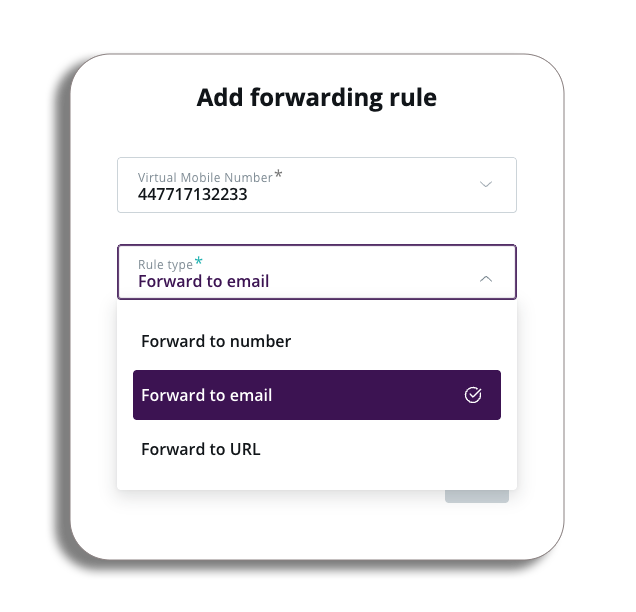
- Rule type: select from the drop-down where you want the messages to be forwarded to:
- Number: Forward to one or multiple mobile phones
- Email: You can forward to one or multiple email addresses
- URL: Currently only possible with API. You will only be able to send to one URL.
- Please be aware: multiple URLs cannot be forwarded to
- Once you have set up your forwarding rule, press Save to create your rule.
Once your fowarding rule is active…
- They can only be turned on/off manually
- Operating hours per day cannot be set – e.g. between 6.00pm & 8.00am.
- They will NOT operate outside of the sending hours a user sets in message settings.
- An existing rule can be edited or deleted.