Sender Settings – Default Sender ID
Contents
- Video
- Accessing Sender settings
- Setting your default sender ID
- Message Centre
- Updating the Default Sender ID from the Message centre
Introduction
PLEASE BE AWARE – To Access Sender ID you must have administration access on the platform.
The Default sender ID is a pre-selected identifier that will be used to send messages unless you manually choose a different one.
Please watch the video below on how to set the Default Sender ID or read the below guide.
Video
Accessing Sender settings
For a quick refresher on how to get to Sender settings, press the arrow.
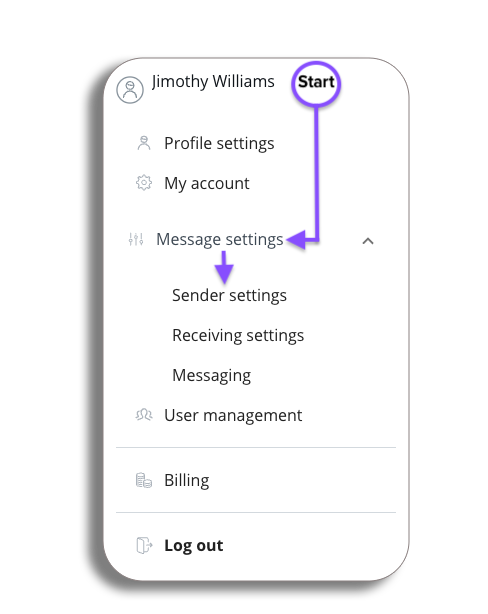
How to get to Sender settings
To begin go to the profile icon and select message settings and sender settings.
To begin go to customer administration by clicking the Profile icon in the top right-hand corner. in the drop-down down you will then need to select Message settings and then Sender settings.
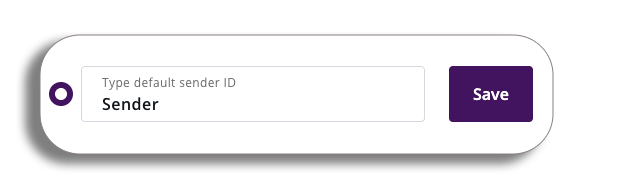
Setting your Default sender ID
You will now be on the sender settings page, on the registered senders tab there will be a Default sender ID option you will be able to access.
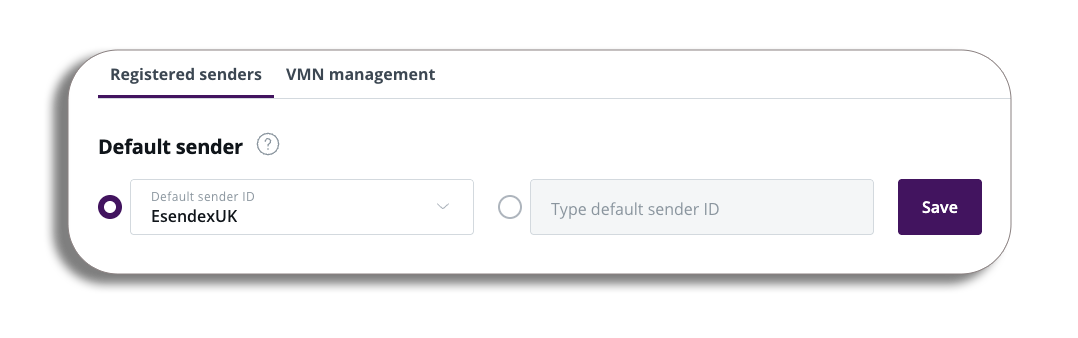
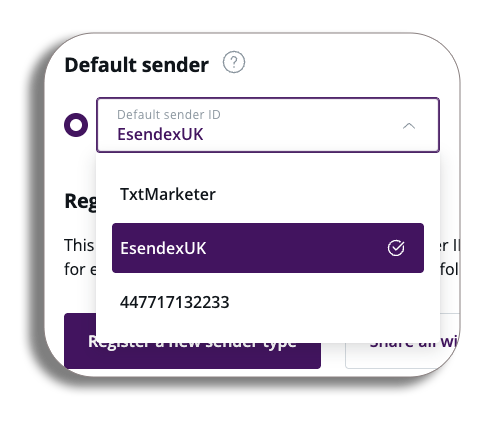
You will have two options for setting your default sender ID. The first option will give a drop option to select which sender ID you want to set to default, the second option will let you type in the default sender ID, once you are have selected your ID press save to finalise.
PLEASE BE AWARE – If the Default sender ID has not been registered for a specific territory and the message is being sent to a location that mandates a sender ID, the sender ID will not be visible to the user.
Congratulations you have set your Default Sender ID, now let’s take a look at it in action.
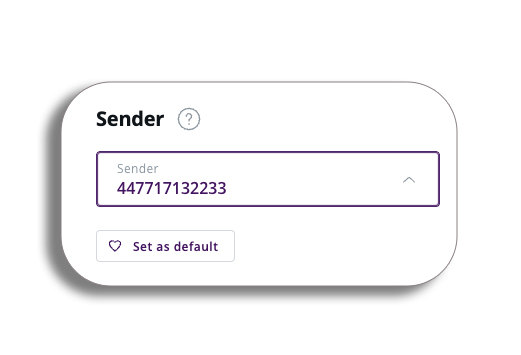
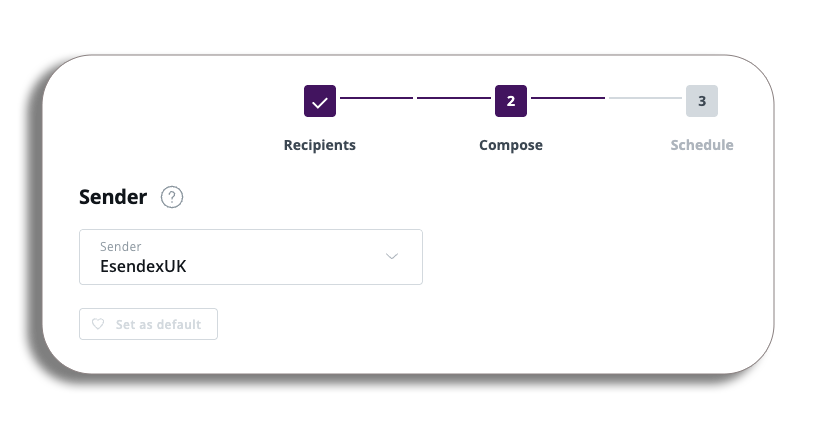
Message centre
If we go to the message centre and start the process of sending a message we can see that the sender’s ID default is the one we set in the sender settings, if another sender ID is needed you will be able to select it from the drop-down.
Updating the Default Sender ID from the Message centre
PLEASE BE AWARE – you will need to have administration access to be able to do the following.
If you do decide to use another sender ID you have created and it is available in the drop-down, after selecting this, you will see that underneath the Sender ID is a button that will let you set this Sender ID as the default.
Returning to the sender settings will now have the Sender ID you selected as the default option.