Sender Settings – Sender ID Registration
Summary
- Video
- How to get to Sender settings
- Registered Senders
- Where are you sending to?
- Registration Documents
- Registration Details
- Regional requirements
- Supporting Documents
- Terms and Conditions
- Sender ID copy
- Updating your copy
Introduction
The Sender ID registration process has been upgraded to now support multiple Countries (currently Australia and France), along with the capability to register for multiple destinations at the same time. This enhancement streamlines the registration process, resulting in a faster and more efficient experience for users who need to manage sender IDs across different regions.
Video
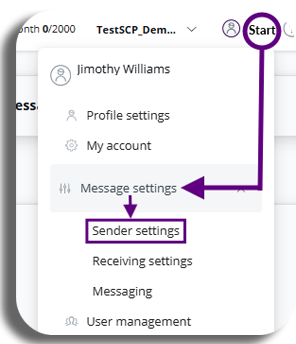
How to get to Sender settings
To begin go to the profile icon and select message settings and sender settings.
To begin go to customer administration by clicking the Profile icon in the top right-hand corner. in the drop-down down you will then need to select Message settings and then Sender settings.
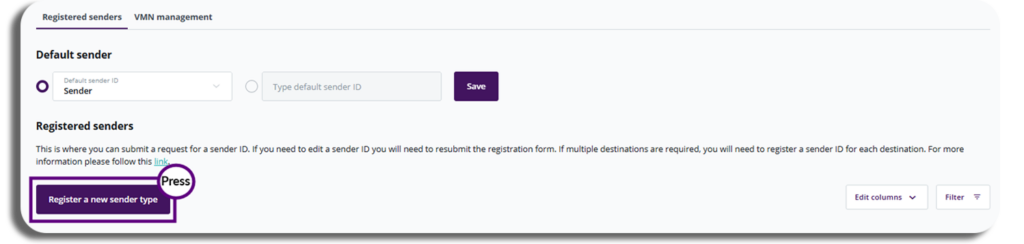
Registered Senders
You will now be in the Registered Senders tab in sender settings, select the ‘register a new sender type’ to begin Sender ID registration.
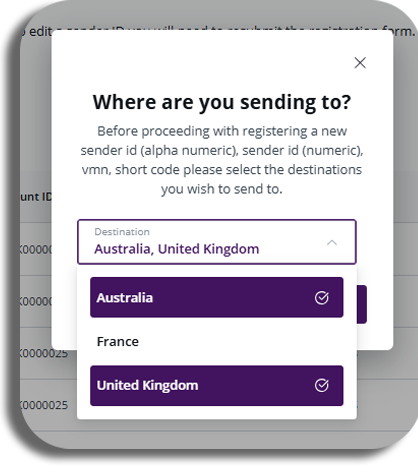
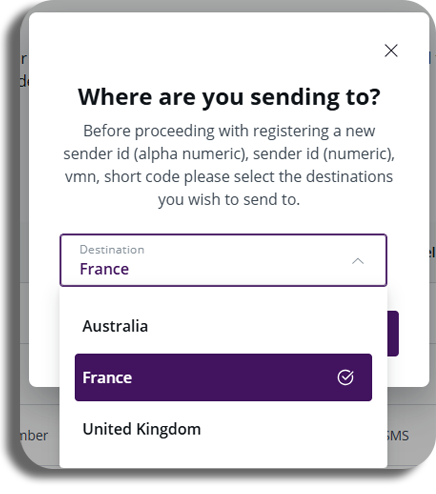
Where are you sending to?
- In the pop-up select the destination, we support registration for multi destinations (currently Australia, France, UK). You will be able to select multiple destinations if the sender ID requires it.
- Once you have selected who you are sending to, press the start registration button.
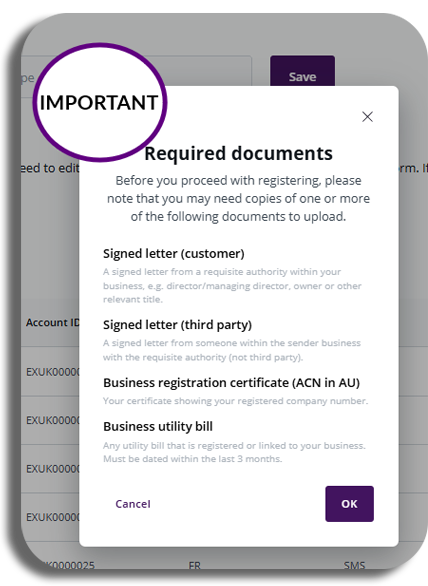
Registration Documents
- The next pop-up will give you a list of documentation you can use for registration
- PLEASE BE AWARE – you may need to provide additional evidence to support your case/application. (although it may not be mandatory at this stage) If not some sender IDs may need to be requested to provide evidence documentation later.
- Once you have read through the required documents list, press the OK button.
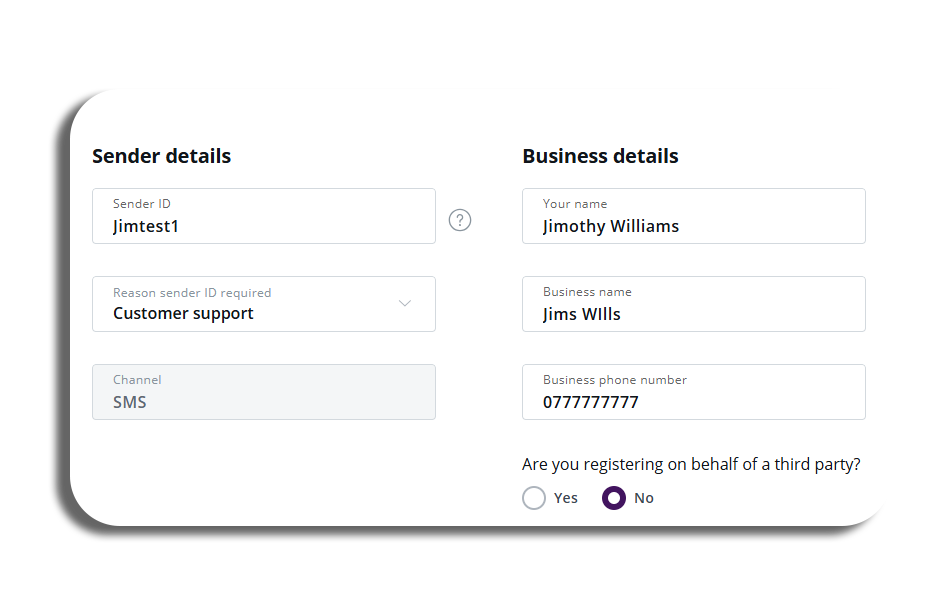
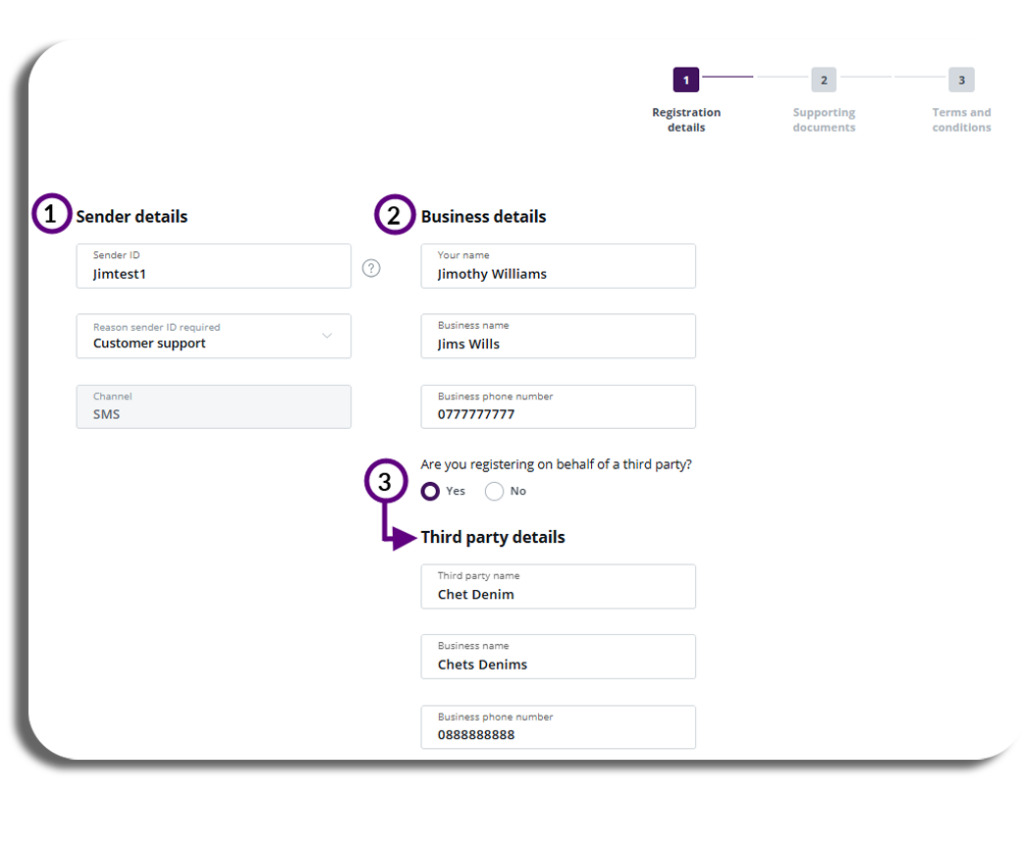
Registration Details
We will now begin the first stage of registering a sender ID, before we begin PLEASE BE AWARE of the following.
- All Sender IDs Will be reviewed manually by our Customer Success team.
- Please be aware some sender IDs may be selected and subject to a third-party review. This may cause a delay in registration before approval dependent on the third-party review process.
- Sender details: Enter the sender ID details you will need the following:
- Sender name
- Use case (selected from drop-down)
- Channel (only SMS currently)
- Business details: If needed you are also able to add the business details as well:
- Business name
- Business something
- Business phone number
- Third-party details (optional): Select if you are registering on behalf of a third party.
- You will require to input the same criteria as Step 2 (but for the third party).
Regional requirements
Your regional requirements may differ from the countries you have selected to register the sender ID to, Here we can see that Australia requires a sender company registration number and website URL while the UK just needs you to select a drop-down from the list of industries provided.
You can add any additional supporting information just below this if needed (you will only be able to add text in this section).
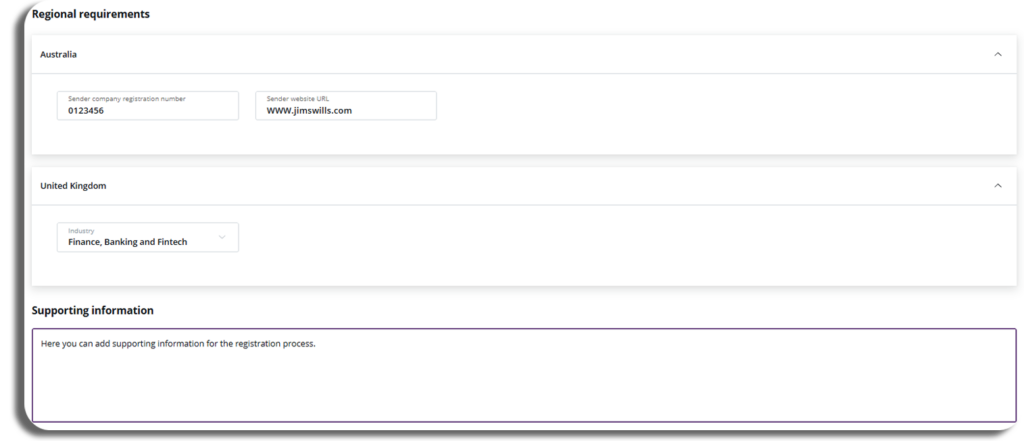
Once you have completed all of the above press the next button to proceed to the next section.
Supporting Documents
New Documents
We are now at support documentation, You will need to add your new documents for the registration process, to do this select the three dots and select upload file, then select your file to upload.
We have also provided templates for you to use if needed, these templates will be of a direct customer or if you are working for a third party.
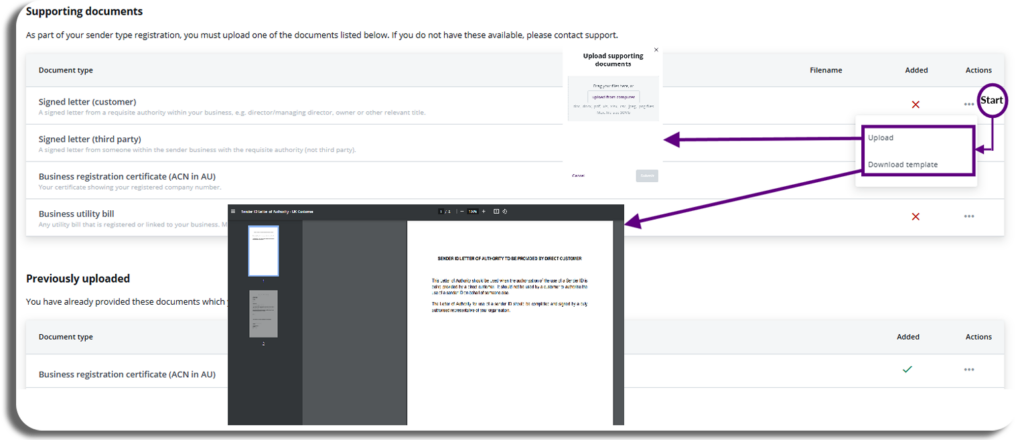
Previously uploaded.
The sender ID process now captures any documents that you have already uploaded previously, you will be able to add these to your registration to speed up the process.
Selecting the three dots will give you the option to add the previously uploaded document to your support documents for registration as well as the option to view the document if needed.
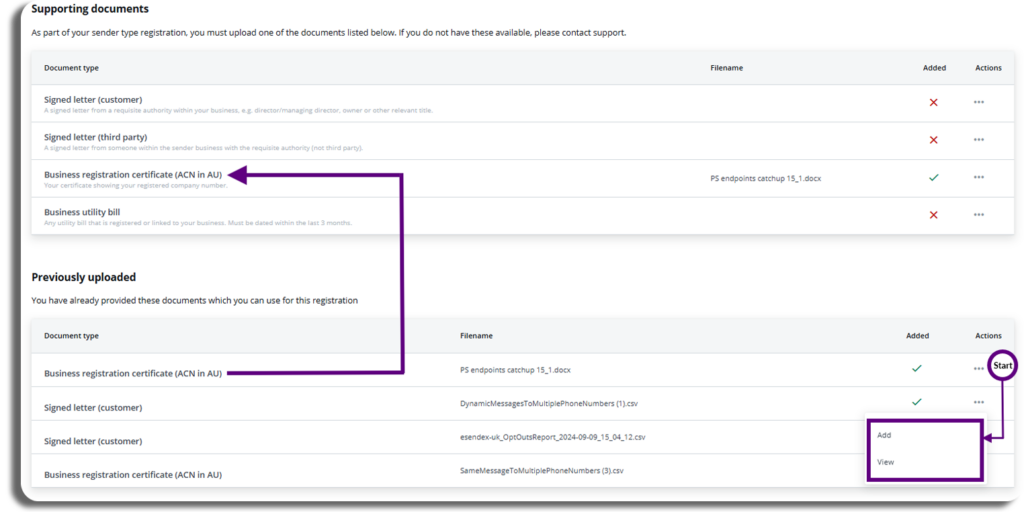
When you have finished adding your support documentation press the next button.
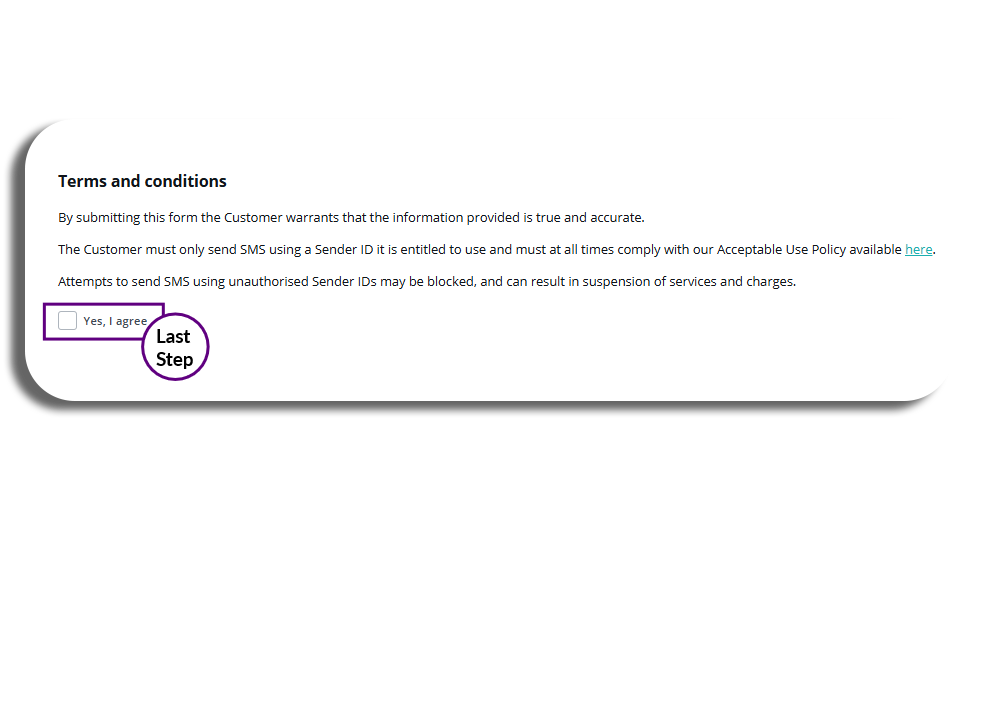
Terms and Conditions
Please read before agreeing
- On the terms and conditions page, read through the statement provided and agree, then press submit.
- Congratulations, you have registered a sender ID.
- You will be taken back to the registered sender’s list where you will be able to see that your sender ID is in review
- You will need to check back here to see when your sender ID has been approved.
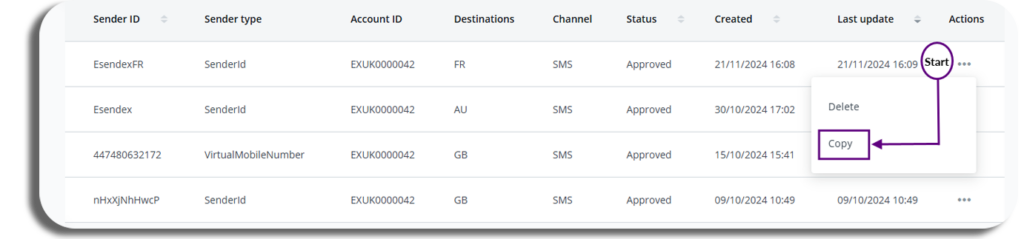
Sender ID copy
Once you have created your first registered sender ID you will have the option to create a new one will be much easier.
By selecting the three dots here you will have the option to delete the sender ID or copy it, this will pre-fill areas of the sender application for you making it more efficient to create a new sender ID.
Updating your copy
- Once you have selected the Sender ID you want to copy you will be taken back to the registration process where you can update the current destination set on the previous Sender ID for the new copy.
- Select the start registration button
- When you arrive at the sender registration page you will see that the platform has auto-filled your information from the previous sender ID.
- You can make any necessary amendments if required and proceed through the process and you have done before.
- PLEASE BE AWARE – if you have selected a new country for your copy you may have to complete some additional sections and may need to update or add additional documents.